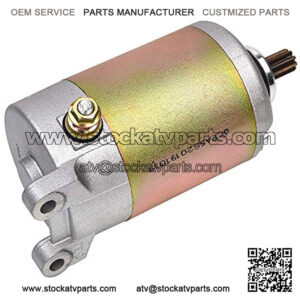
If testing the starter circuit indicates a fault in the starter motor , disconnect the battery and remove the motor from the car – complete with its attached solenoid if it is a pre-engaged type of motor.
To trace the fault and carry out repairs, you will nearly always have to strip down the motor, especially if the fault is in the commutator or brush gear .
However, the Bendix gear of an inertia-type starter can be repaired without stripping; removing the motor from the car gives sufficient access.
Some faults, such as a badly worn commutator, are beyond repair and you have to buy a new or exchange motor. However, you can renew worn bearings.
Damage to the electrical windings is usually too difficult to deal with at home. An auto-electrician can cure a minor short circuit in the field coils , but anything else calls for fitting a new or exchange motor.
A single fault in the motor is probably worth repairing, but if you find more than one fault check the cost of all the spares you need. You may find it cheaper – and quicker – to replace the motor with an exchange unit.

Removing the starter motor
Always disconnect the battery before removing the starter motor, which is often awkwardly placed low down on the engine . You may have to raise the car on axle stands and work from below.
Disconnect the battery (earth terminal first) to avoid an accidental short circuit.
Remove the nut that holds in place the heavy lead connecting the starter to the battery. With an inertia-type starter take care not to twist the terminal post as you are unscrewing the nut. Hold the locknut on the post with an open-ended spanner.
Unscrew the bolts that hold the starter to the engine backplate.
With a pre-engaged starter, the heavy lead from the battery is connected to the solenoid mounted on the starter body. Take careful note of the other leads to the solenoid before you disconnect them.
Remove the two or three bolts holding the motor to the engine backplate.
Lift out the motor, watching for any spacer shims . Collect them and make a note of their order so that you can refit them correctly.
Reverse the removal procedure to refit the motor.
Testing a motor for short circuits
Use a test lamp fitted with crocodile clips to make these tests. You will have to remove the endplates from the motor.
The field coils are insulated from motor casing by wrappings. A break in the wrappings can cause a short circuit.
If the field-coil test below indicates a break, and the break is only a minor one, an auto electrician may be able to repair it.
If the armature test below shows a short circuit, fit a new or exchange motor.
If there are little splashes of solder on the motor, or any other sign that it has overheated, fit a replacement motor.
About starter motor
“how does a starter motor work”
“car starter motor”
“how to fix starter motor problems”
“types of starter motor”
“the starter motor is driven by”

